Shadowrocket Setup Guide
Add a server or subscription, choose a routing mode, then connect and verify access.
Before you start: This guide uses the iPhone / iPad interface. Install Shadowrocket first: get it from the App Store for iPhone / iPad for a one-time $2.99 purchase in the US; see the App Store listing for system requirements. The Mac / Windows / Android / Linux versions are free and available from this site's download page. If your computer or Android device blocks installation, first verify the file source, then follow the installation instructions for your system.
Prepare an existing subscription link or server details; either one is enough. This site does not provide servers or subscriptions. A one-time app purchase is not a service plan.
Add a server or import a subscription
Open Shadowrocket and check SERVER on Home. If the entry you need is already there, select it; there is no need to import it again. If the list is empty, choose a method based on the details you have: enter the connection parameters for a single server manually with Add Server, or choose Subscribe for a link that retrieves a group of entries. You do not need to use both methods.
Details for a single server
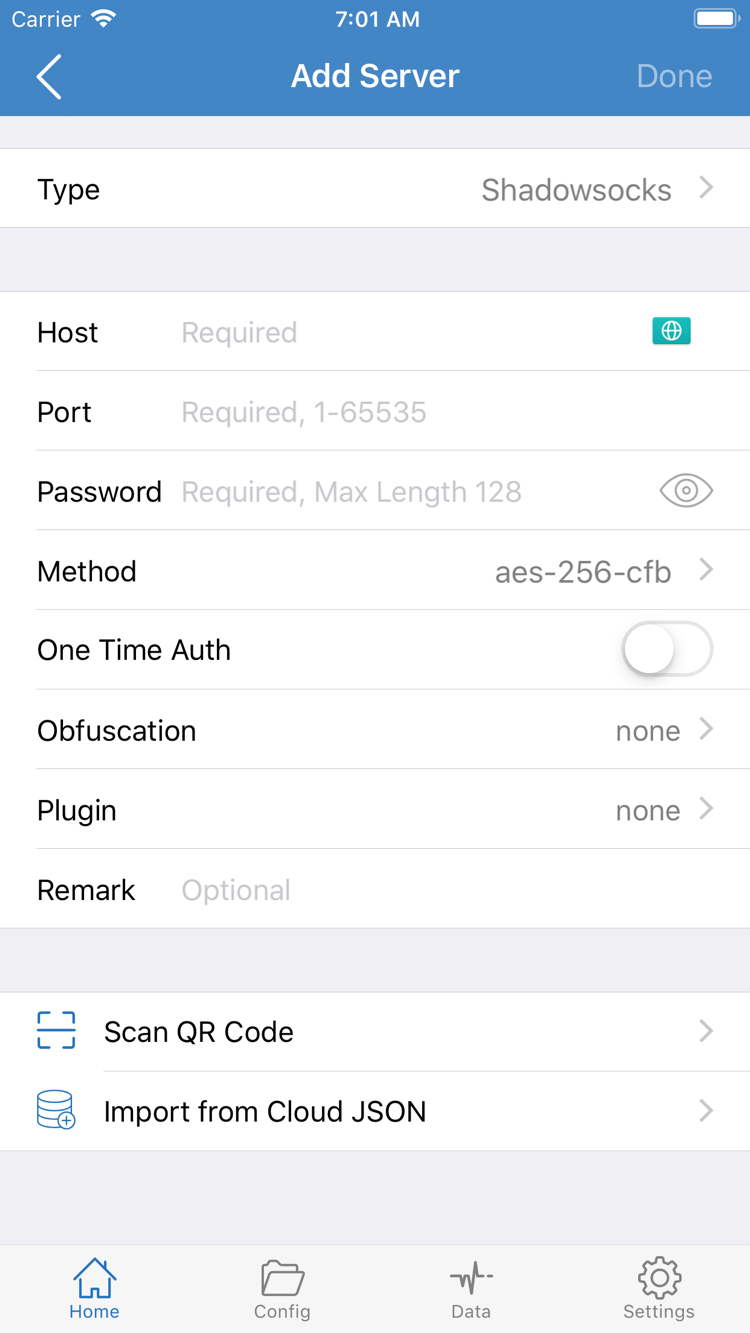
Tap Add Server, select the protocol specified in your details under Type, then enter Host and Port. In the form shown in the screenshot, Password and Method correspond to the password and encryption method in your details. Fields vary by protocol, so use the fields shown for the selected Type. Do not paste a full link containing a protocol prefix and path into Host, and do not guess the password or encryption method from field names. If any details are missing, check the original information first.
If you have a QR code for a single server, you can also use Scan QR Code in Add Server. After scanning, check Type and the address before saving. Do not share a QR code containing connection credentials in a public group or use an untrusted QR code to overwrite an entry that currently works.
Subscription link
On Home, tap the add button. On the add screen, select Subscribe under Type, paste the full subscription link into the address field, preserve its original path and parameters, check for extra spaces at either end, and save. Return to Home and wait for the subscription to load, then look for selectable entries in SERVER. Import from Cloud JSON is a different input method, not the place to paste a standard subscription link.
After saving, select a server to test. Names in the list only indicate that entries were retrieved; they do not mean every entry is usable. If no selectable entries appear, do not turn on the connection switch yet. Go to Step 5 to check the import result.
Choose a Global Routing mode
After selecting a server, stay on Home and tap Global Routing. This setting determines how traffic is handled; it does not switch servers. If a prepared rules file is available, choose Config and confirm that the expected file is active. If you are only running a comparison test, note the original mode first and switch back when the test is complete.
- Config: Routes traffic according to the rules in the current configuration. Selecting a server does not mean every request will be routed through it; rules may still send requests directly or reject them.
- Proxy: Routes traffic within its scope through the proxy. You can switch to this mode briefly for comparison when determining whether a problem is caused by the server or the configuration rules.
- Direct: Does not route traffic through the currently selected proxy server. Use it to check whether the current network can access a site that should be reachable directly; this is not the same as turning off the connection switch.
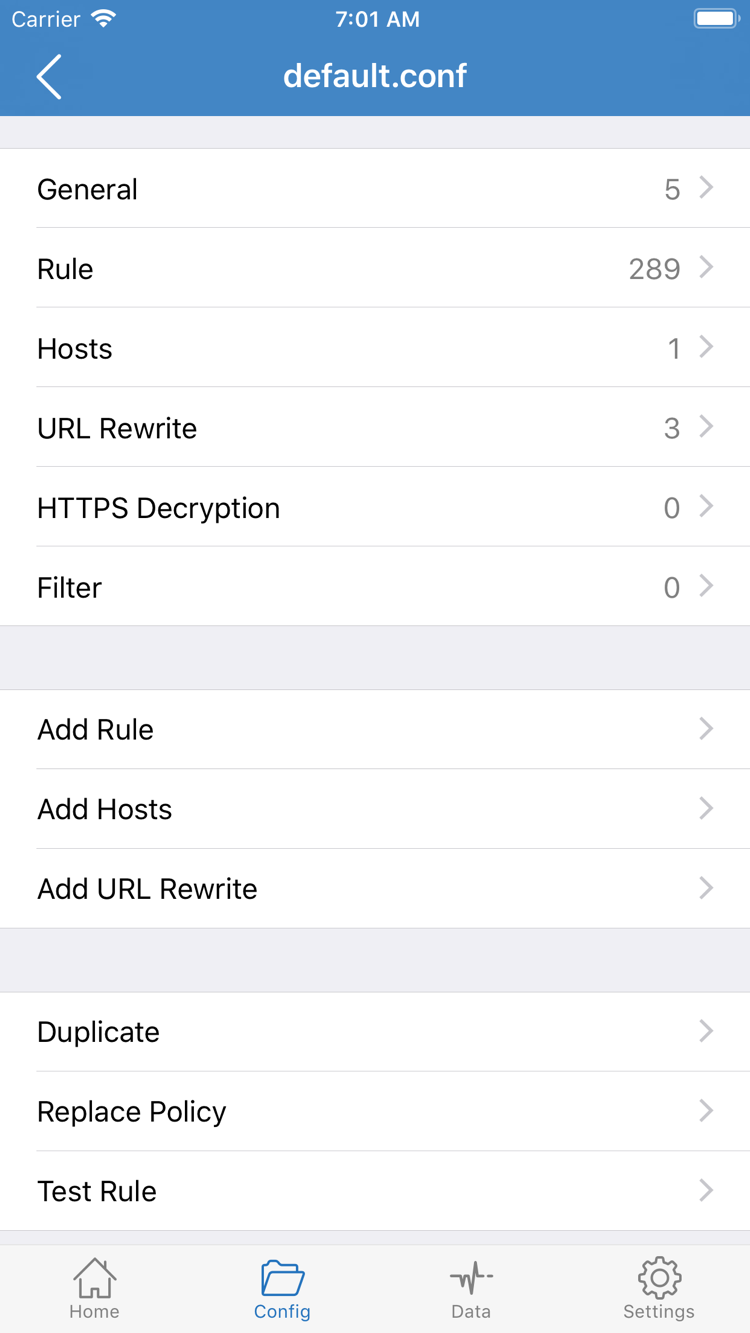
After choosing Config, open Config at the bottom and check the configuration list. Compare the filenames with the one you expect and confirm which file is in use. Open a file to view the editor shown in the screenshot, with sections such as General, Rule, and Hosts. You do not need to add rules or change HTTPS Decryption to verify the first connection. If you are unsure which configuration suits the current network, keep the original file and avoid changing rules, name resolution, and server settings at the same time.
If the same server works in Proxy but not in Config, first check which rule matches the destination. For example, a broad rule may match before the request reaches the final FINAL rule. If you only need to verify the first connection, note what happened; see Configuration Reference for rule order and syntax.
Turn on the switch at the top of Home
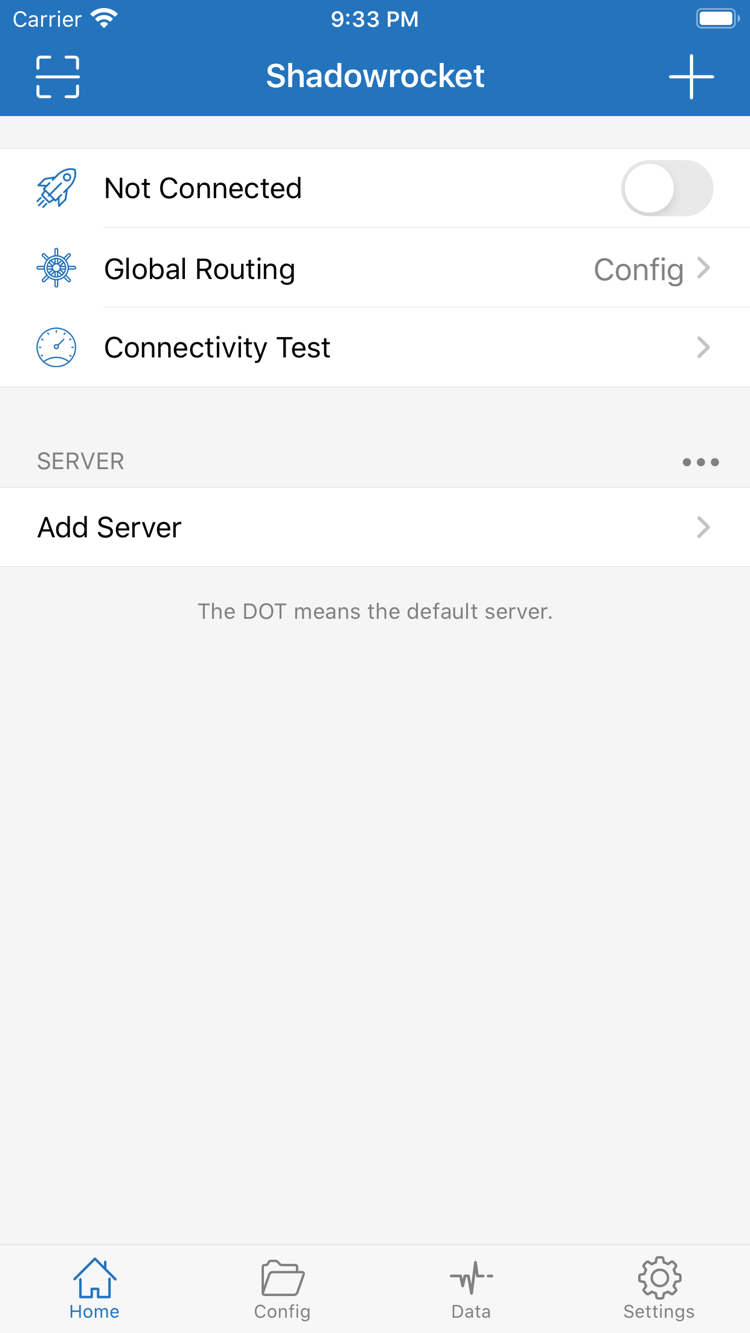
Return to Home, check the current Global Routing mode, then confirm that SERVER has the server you prepared for testing selected. Not Connected at the top of the screenshot means there is no active connection. Tap the switch on that row and wait for the system or app response; do not toggle it repeatedly.
On the first connection, the system may ask to add a VPN configuration. Confirm that the prompt was initiated by the Shadowrocket app you just opened, then approve it as instructed by the system. If you are asked to verify your device identity, complete verification and return to Home to check the switch. If you previously tapped cancel, retry the connection in the app and respond to the prompt. If your device is managed by an employer or school and system restrictions prevent changing VPN configurations, contact the device administrator first; do not remove management settings.
If the switch turns off immediately, note the message on screen, then check for unfinished system authorization or another VPN configuration that is already running. If an existing connection is used for work, confirm its purpose before taking action; do not delete it just for testing. Even if the switch stays on, do not assume everything is working yet: check the server response and actual webpage access separately in the next step.
Verify the server response and actual access
Keep the current network unchanged. First confirm that the switch at the top of Home is still on, then tap Connectivity Test and check the result for the selected entry. A response only means this test returned a result using the current method; it does not show that every website can open, and the latency reading is not a download speed. If the test times out, note the current server and test method. Avoid changing several settings in quick succession.
Next, open a browser and visit a webpage that usually works and does not require a login. Refresh it once to avoid mistaking cached content for a new request. With Config selected, if you maintain both direct and proxy rules, compare a known site for each expected policy. If both pages open, access worked in this test; a successful page load alone does not prove that a request took a particular route. To confirm the route, check the request and policy using the records available in Diagnostics for the current version.
If only one destination fails, keep the same server and try another known-working page. If both fail, you can turn off Shadowrocket, if appropriate, and use a webpage known to work directly to check the underlying network. If that page also fails, first resolve any Wi-Fi sign-in or mobile data connectivity issue. After verification, restore the mode you temporarily changed for testing to your usual setting, then test once more.
Troubleshoot based on where the failure occurs
No selectable entries after import
First check that you saved the subscription link with Subscribe, rather than entering it in Host for a regular server. Check the original details to confirm that the link is complete and still valid, then retry once the current network can access the subscription. For a manual entry, check Type, the port, and the required fields for that protocol. A subscription that cannot be opened and a single server that cannot connect are separate issues.
The switch will not turn on, or reconnects after being turned off
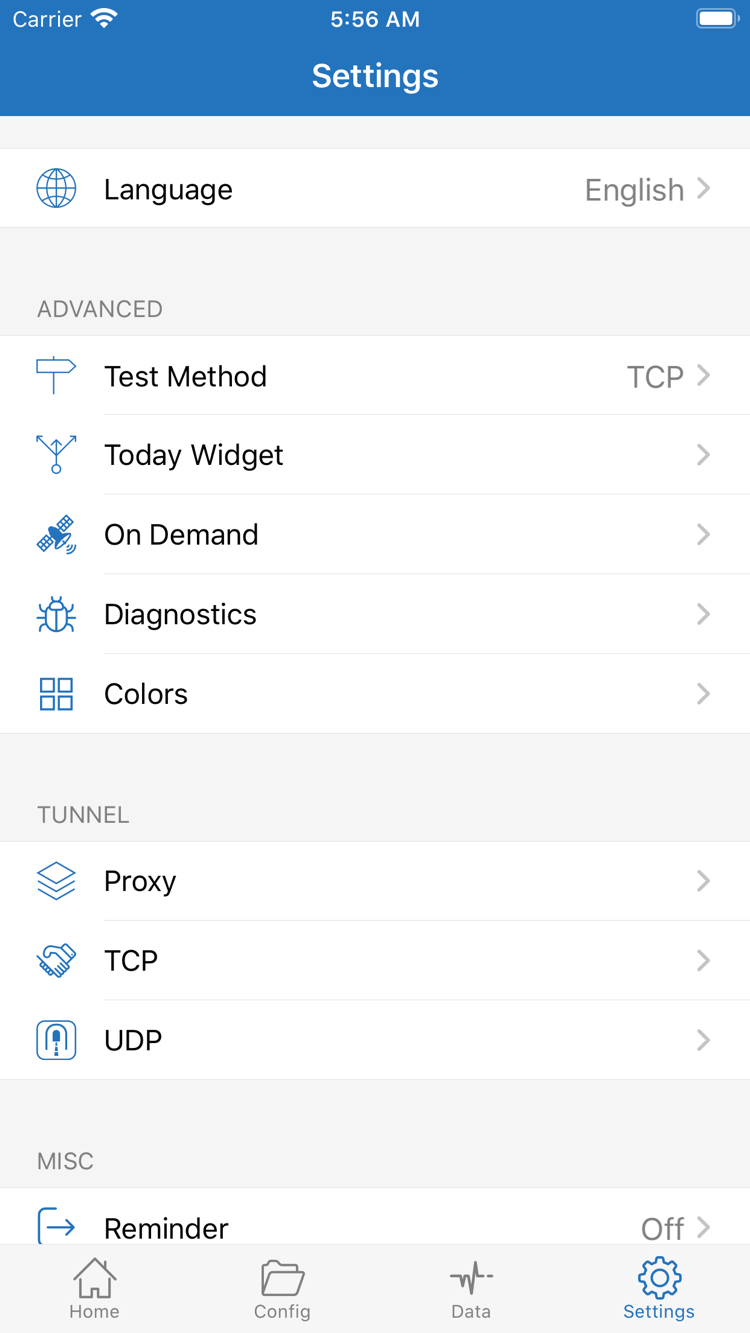
If it will not turn on, return to the system authorization step before considering a reinstall. If it reconnects after you manually turned it off, open Settings and check On Demand for an active trigger. If device policies allow, note the original setting, temporarily disable the relevant condition, test the manual switch again, then restore any settings you need.
The switch is on, but webpages fail to load
First confirm that you selected the right entry in SERVER, then compare Connectivity Test with the webpage result. To compare test results, check Test Method in Settings; readings from different methods should not be compared directly. If Proxy works for the same destination but Config does not, first check the active file and rule order. See whether the request matches REJECT or takes an unexpected DIRECT route. If records show a domain resolution failure, check the DNS settings in the configuration rather than immediately attributing it to an offline server.
Change only one condition at a time and repeat the test with the same webpage. When recording an issue, note the network type, connection mode, failed step, and message. Before sharing Diagnostics records, remove sensitive information such as subscription links, passwords, and server addresses. See Troubleshooting for more help; for the meaning of an option or rule keyword, consult the Glossary.